Guide
Are you ready for take off?
-
Getting started
Getting started
Connect a database
Within the admin panel you can add a project to your team. When adding you will be asked to enter your database details.
Before you can save a database, you must check whether Spinub can connect. You can do this with the "check connection" button.
Database remote access
Your database must be accessible from the outside. If not, you must add the IP 35.204.165.123 to your firewall white list. It is not possible to use a database from a localhost.
Spinub makes no changes
Your database structure is not changed by Spinub. All the configuration you apply within the CMS is stored in Spinub. Data that you adjust via the CMS is stored in your own database.
First start
The first time you open a new project, Spinub will immediately set up the most logical configuration for you.
What does Spinub do automatically:
- Set up table relations
- Create fields
- Create columns
- Configure menu
-
Edit menu
Edit menu
A menu item represents a table in your database. It is therefore good to ensure that all tables that you want to edit in the CMS are placed in the menu.
You do not have to place child tables that are related to a table in the menu. By setting up relationships you can display the child tables within the parent records.
Good to know:
More information about the use of relationships can be found in the chapter "Relations".Add menus
The easiest way to add a table to the menu is via the relationship manager. See the image for the steps to be taken.
Add or remove multiple menus
If you want to add multiple menus, you can do this via the menu editor.
Change order of menu items
The order can be changed in the following way.

Renaming the menus
Within the same menu you can also rename the different menu items. The CMS needs a name in plural and in singular for each table.
Good to know:
There are several strategies when it comes to displaying linked tables. More about this is described in chapter "Edit relations> Different configuration variations" -
Edit list view
List view
The different columns can be selected within the list views. Every column in the Laravel table can be created as a column in Spinub. For the overview it is wise not to add more than 5 columns.
Rename a column
You can rename columns via “edit columns”. You can give any name to the column you want. These do not have to match the name column or something similar.

Good to know:
Spinnub never changes the structure of the database. The changes are purely in the configuration which are stored in Spinub itself.Reorder columns
It is possible to change the order of the columns. This can be done via the menu “reorder columns”
Add default sorting on coloms
If you want to apply a different sorting to your table, you can set this via "Configure view"

-
Edit detail view
Detail view
The edit and create views (detail view) use the same Spinub configuration. Adjustments will be active for both views. All fields can be adjusted individually.
To change a view, it must be open in Spinub. It is not possible to edit views of other pages without having them open.
Good to know:
When editing the type of field or the column name in the Laravel database, Spinub will forget the configured configuration.Add and remove fields
Via “Add and remove fields” you can add or remove multiple fields at the same time. When deleting fields, the configuration of the field is saved. If you activate the field again at a later stage, the configuration will become active again.
Good to know:
Spinub never changes the structure of the database. The changes are purely in the configuration which I saved in Spinub.Rename and adjust field
Renaming or modifying a certain type of field can be done via "Edit fields".
Some fields require additional settings, which will appear as soon as you change the type of field.
Good to know:
The different types of fields that can be used can be found under chapter “Field types”Change the order of the fields
The order of the fields can be changed via “Reorder fields”. You can only sort fields that you have active in the CMS.
-
Field types
Field types
You can select a field type for each database field that you want to display in Spinub. Some fields require additional configuration which you can set when selecting the field.
Good to know:
You can read how to set a field in chapter "Edit fields".Varchar
The varchar field is a normal input field. Can be used for any database type.

Checkbox
The check box is displayed as a toggle button. This type of field is especially useful for INTEGER or TINY INT database fields. When the toggle is selected, "1" is stored in the database and "0" in an unselected state.
Text area
This rich text editor can be used to save html. This field is especially useful for large database fields (eg TEXT). The layout is automatically applied to an html format. It is only possible to use standard inline html tags. Other tags are automatically removed.
Integer
This field only allows you to add numbers. This can be used if database field can only contain a numeric value.
Float
You can use the float field if you need to enter a float in the database. It is possible to use both a float with a comma and a period. It is not possible to enter letters here.

Dropdown
The dropdown field works with a list of values and labels you specify. The value is stored in the database and the label is what the user sees within the CMS.
You can use this field for example to neatly display an id translation without creating a "linked dropdown" through a relation.
Good to know:
To retrieve values from another field, a "linked-dropdown" field is required. See chapter "linked dropdown".Optionally, you can choose to use a Font Awesome icon (version 5 or 6) with the value in the drop-down menu. The fields "icon" and "color" are added. In the list view, only the icon will be displayed. See the example below of a possible elaboration
Dropdown linked
You can use the "linked dropdown" field to add a dropdown field with the ID of another table. If the remote table is specified as a relation in the relation manager, the correct settings will be applied automatically. An "ID" column is required for this field to function properly.
Good to know:
Setting up relationships via the "relationship manager", is explained in chapter "relationships".You can also manually add or edit these settings. The remote table must be entered in the "remote field". The "remote label" field is the value displayed in the CMS as a label.
Linked radio
This field has the same effect as a "linked dropdown" field, only a radio list is shown here instead of a dropdown. For more information check the chapter "linked dropdown".

Id - read-only field
This is a read-only field which you can use to display an "id" column, for example.
Date picker
The datepicker field can be used for the date fields of the CMS.
Datatime picker
This is a "date picker" field with the option to enter a time. Also a "datetime picker".
Upload field
The upload field can be used for uploading files to the CMS. The upload works by means of an FTP or SFTP connection directly to the server on which the application is installed.
An upload field should always be a VARCHAR field. The file name is stored here. You can then use this in your application to show the correct link or to retrieve the correct file.
Files are placed in the following folder structure on:
"/ table-name / record-id / field-name / image-example.jpg". In this example, "image-example.jpg" is stored in the VARCHAR field.
Best practice:
It is useful to place the "remote storage" directly in the storage folder. This way you can directly use these files within your Laravel application.Good to know:
Setting up a "remote storage" is described in the chapter "remote storage".Image field
The image field will be launched later this year. This field is specific for uploading images and allows you to apply edits to the image you are about to upload first.
-
Table relations
Table relations
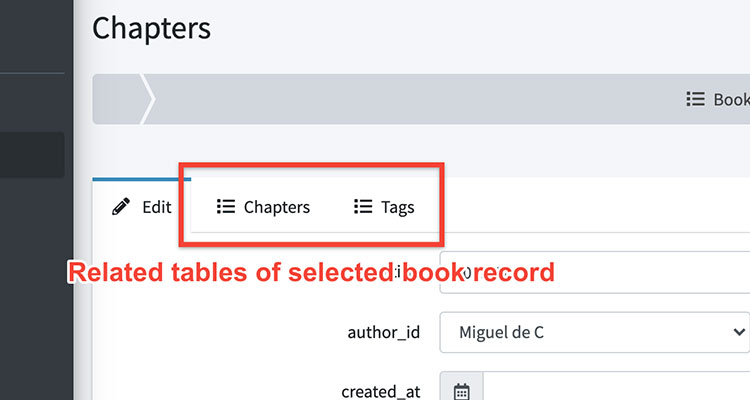
Table relations within Spinub are shown as tabs within the detail view of a selected record. Both Foreignkey and Pivot relations can be added.
Foreign key relationship
A foreign key relationship is the easiest relationship. This is because a child record always belongs to 1 parent. This allows you to easily create child records within a parent record, which are automatically assigned the parent record id.
Within a relationship it is possible to link other relationship tables.
Establishing a foreign key relationship
When setting up your CMS, spinup will already try to recognize the relationships. This is done based on the table names. If you use standard Laravel names, all relationships will be established automatically.
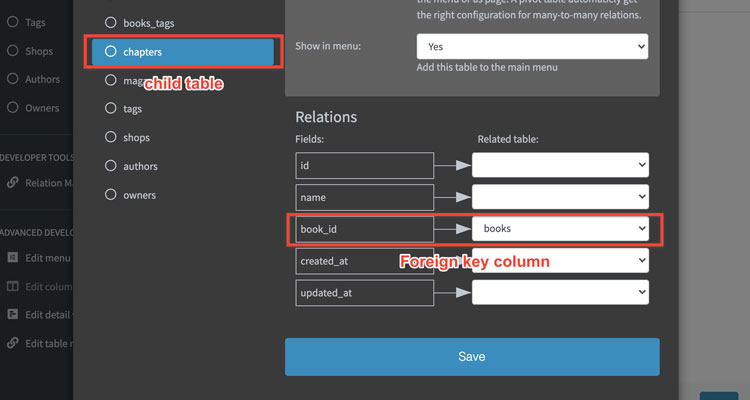
You can find the relationships in the relationship manager. On the left are all tables that your project has. Per table you can see which fields it has and to which tables these fields have relations.
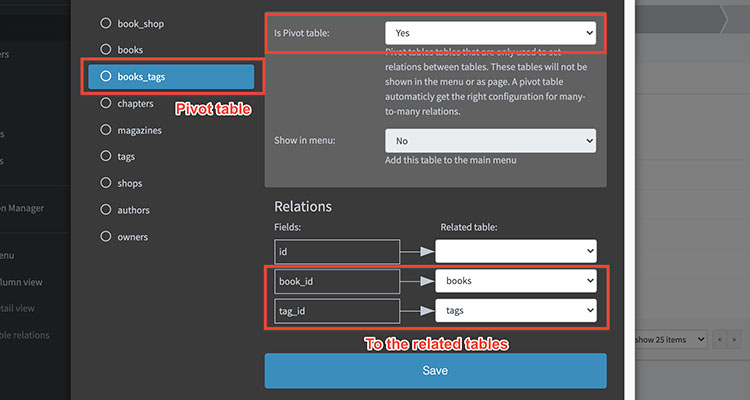
Pivot relationships
Pivot relationships work with a Pivot table. Spinub will also display this relationship as a tab. The difference is that you can select records from the child table within the tab. This is because it may be that a parent record has multiple child records, but a child record has multiple parent records at the same time.
A good example is a books_tags table. Since 1 tag can contain multiple books, 1 book can also contain multiple tags. The most convenient is to add tags and books to the main menu. The relationship can then be established within a selected record.
You can also choose not to display the book relationship within tags. Or if you don't want the tags to be edited you can leave them out of the menu.
Establishing a pivot relationship
Spinub will also try to recognize the correct configuration in pivot relationships. You can adjust the relationships via the relationship manager. You must link both tables to the pivot table. In the settings of the pivot table the "is pivot" should be selected. This prevents the pivot table from being displayed as a tab.
Advanced relationship settings
For an advanced configuration, you can choose to set relationships via “edit table relation”. For the option, you must be within the record in which you want to edit a relationship. With this configurator you can more easily add multiple relations.
Different configuration variations
If you have a database with different relationships, there are often different ways to set up the CMS. For example, consider the following example.
Continents > Countries > Cities
The most obvious configuration is to include continents in the menu and add “countries” and “cities” as tabs.

But what if the table of continents is already completely filled and it is not necessary that it can be edited. For example, we can add “countries” to the menu instead of “continents”. You can then add a “linked dropdown” within the country edit page to select a continent.
-
Filestorage
Filestorage
A file storage can be added in the admin settings of a project. This can be an FTP or SFTP server. Files uploaded in Spinub using the upload field are stored directly in the remote storage. Spinub does not store files on its own servers
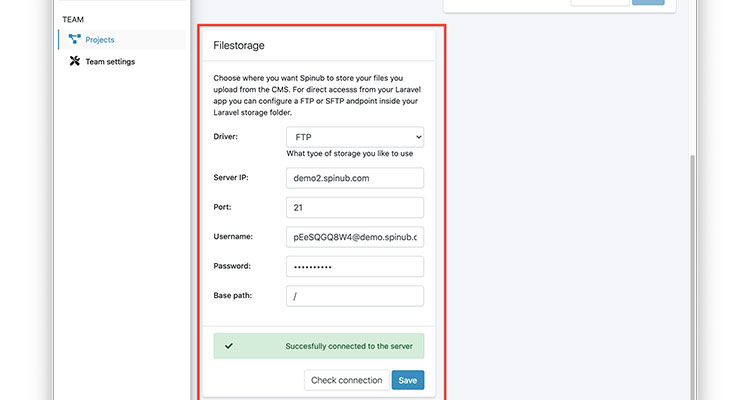
It is useful to place the FTP / SFTP location within the storage folder. This way Laravel can directly use the files. The reference to the file name is stored in the corresponding database field.
-
Premium
Premium
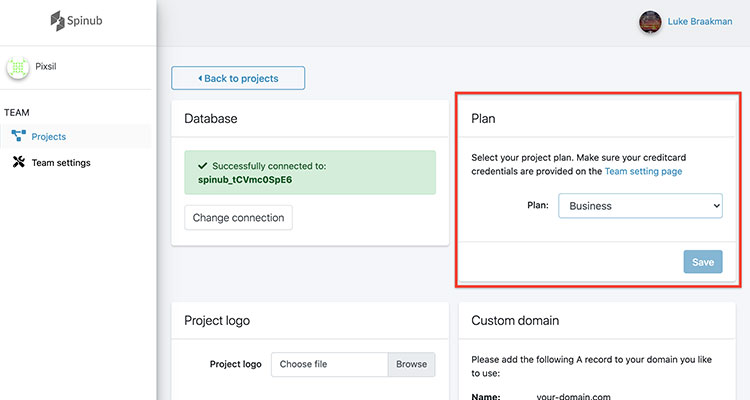
To use premium projects, a credit card must first be entered. If you do not have premium projects yet, no money will be debited.
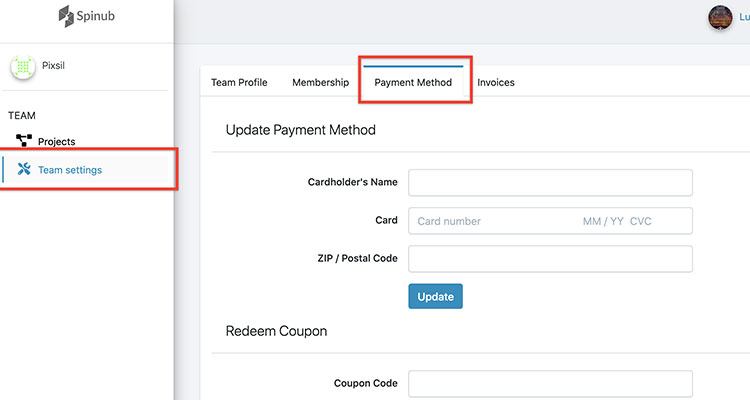
At the settings of a project you can choose a specific plan. Choose your plan and press save. From this moment on, you can use the premium functions of your chosen plan within the project.
End subscription
You can also temporarily disable a project via the project settings. From this moment on, the project can no longer be used and no costs will be charged for this project. You can restart the project at any time.
-
User rights
User rights
User rights and groups will be implemented in the “unlimited” plan. It will be launched later this year. If you want to use this earlier, please contact our support team.
-
Custom domain
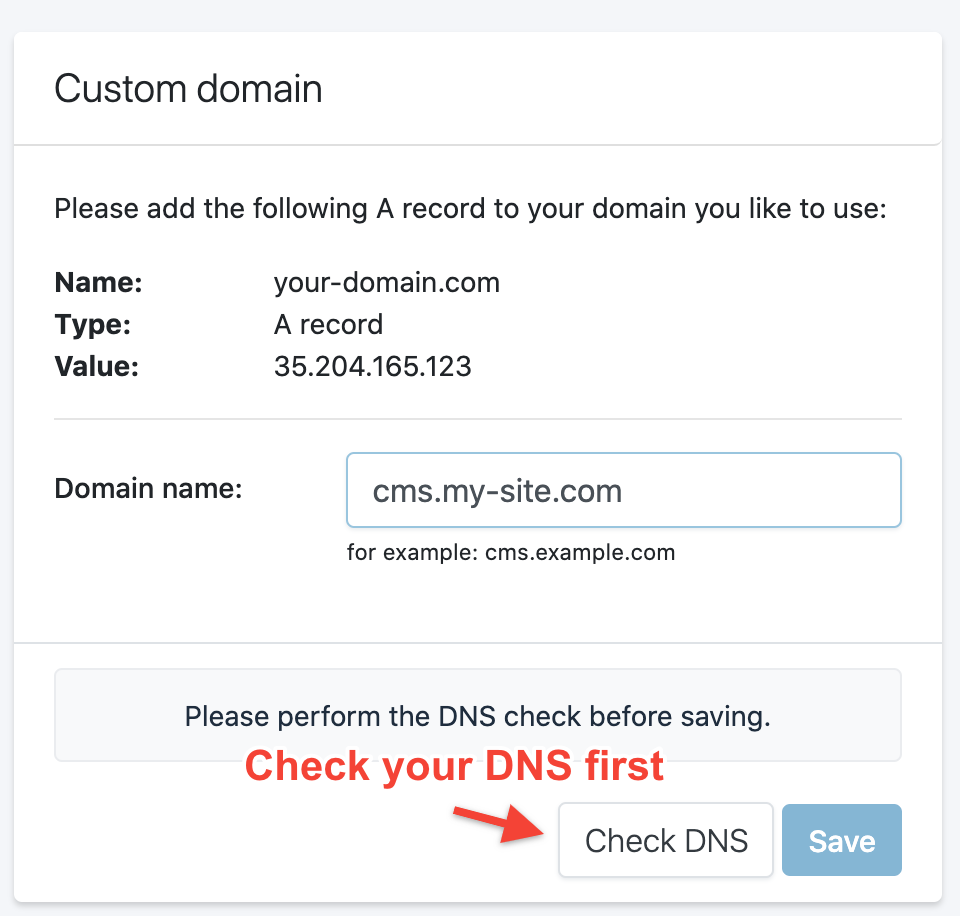
Custom domain
You can link your own subdomain to Spinub. This domain replaces cms.spinub.com with the domain you set.
-
API
API
API endpoints and hooks will be implemented in the “unlimited” plan. It will be launched later this year. If you want to use this earlier, please contact our support team.